2017年1月19日星期四
Config two SAS Controller in Dell 690
How to config two SAS controller in one PC (another SAS3444e 3GB Raid Controller)

2016年12月9日星期五
CKeditor tabletools configuration
CKeditor is a great tools set in HTML CMS. It document is clear and simple.
Tabletools is a extension for table, for "table" plugin, Ckeditor get this:

Tabletools plugin get this:
a right click in the unit cell of table, can modify structure of table.
 It also can control cell properties like types color.
The install dependence is following list:
Ckeditor
Tabletools is a extension for table, for "table" plugin, Ckeditor get this:

Tabletools plugin get this:
a right click in the unit cell of table, can modify structure of table.

The install dependence is following list:
Ckeditor
- table
- tabletools
- contextmenu
- menu
- floatpanel
- panel
it like a support chain, but after we install all of them in a simple Ckeditor, the table menu button disappear from the panel menu. all step is this:
install plugins file to ./ckeditor/plugins, include table, tabletools, contextmenu, menu, floatpanel, panel
modify ckeditor.js in :
extraPlugins:"", --> extraPlugins:"table",extraPlugins:"tabletools",extraPlugins:"contextmenu".....
Finally, add all plugins folder to plugins, and only two configuration items are needed:
extraPlugins:"table",extraPlugins:"tabletools"
2016年12月4日星期日
Drupal 8 CKeditor Extend's plugins install: colorbutton
ColorButton Module in Drupal is used for add two button in CKeditor editing interface, it can contral the content font show in color and both the font back ground color.
Open Source is like nightmare, we thought we can get open mind, but it actually like another human nightmare: democracy. a lot of open source modules in Drupal lake good documents, what you can do is Guess.
If you following the usually way to install a Module in Drupal 8 for Ckeditor's plugin, it doesn't work.
CKeditor in Drupal 8 is default become a core module, now the interface in Drupal 8 called extend, the CKeditor has itself plugins, so you know they use the similar word to express the similar logic, how you can keep understand what they said? :)
The logical is like this
Drupal 8 --> extend(module) --> Ckeditor --> plugin --> colorbutton
this is just a beginning.
If you install Drupal 8 module: Colorbutton(link), it will ask you install another depend module: Panel Button (link), that's usually Drupal style, after you install both modules and config them in CKeditor, to drag the control button to the running environment, you will get a wrong editor interface when you try edit a article or another thing. it's because the configuration is not finish.
The Drupal Colorbutton module page tell you should install a plugin in this address:
http://ckeditor.com/addon/colorbutton
that's the same name, but that's CKeditor's plugin, if you read Ckeditor help to want to install this Ckeditor plugin, it doesn't work anymore, the filename are all different, so we continue to guess...
the CKeditor's plugin Colorbutton give the install address: siteaddress/ckeditor/plugin..., in Drupal 8, you can't find the path, the Drupal module Colorbutton said to install in /libaries/, there isn't a path in Drupal site also, but from the error message in Javascript, we have to create a folder libraries in Drupal web site root, and copy the CKeditor's plugin Colorbutton file to there:
Drupal site root/libraries/colorbutton
and this plugin prompt should install another plugin Floating Panel (link), so another ckeditor plugin
Drupal site root/libraries/floatpanel
the Drupal depend module Panel Button is also need a same CKeditor plugin:
Drupal site root/libraries/panelbutton
It doesn't finish, the error still there, because we don't know how to config the 5 plugins each other, from the Javascript error message, find the file(also from a article) , find the file:
\core\assets\vendor\ckeditor\ckeditor.js, find the item extraplugins:"", modify it like this:
extraPlugins:"colorbutton",extraPlugins:"floatpanel",extraPlugins : "panelbutton",
It works!
conclusion:
to install a Drupal module, you should:
Open Source is like nightmare, we thought we can get open mind, but it actually like another human nightmare: democracy. a lot of open source modules in Drupal lake good documents, what you can do is Guess.
If you following the usually way to install a Module in Drupal 8 for Ckeditor's plugin, it doesn't work.
CKeditor in Drupal 8 is default become a core module, now the interface in Drupal 8 called extend, the CKeditor has itself plugins, so you know they use the similar word to express the similar logic, how you can keep understand what they said? :)
The logical is like this
Drupal 8 --> extend(module) --> Ckeditor --> plugin --> colorbutton
this is just a beginning.
If you install Drupal 8 module: Colorbutton(link), it will ask you install another depend module: Panel Button (link), that's usually Drupal style, after you install both modules and config them in CKeditor, to drag the control button to the running environment, you will get a wrong editor interface when you try edit a article or another thing. it's because the configuration is not finish.
The Drupal Colorbutton module page tell you should install a plugin in this address:
http://ckeditor.com/addon/colorbutton
that's the same name, but that's CKeditor's plugin, if you read Ckeditor help to want to install this Ckeditor plugin, it doesn't work anymore, the filename are all different, so we continue to guess...
the CKeditor's plugin Colorbutton give the install address: siteaddress/ckeditor/plugin..., in Drupal 8, you can't find the path, the Drupal module Colorbutton said to install in /libaries/, there isn't a path in Drupal site also, but from the error message in Javascript, we have to create a folder libraries in Drupal web site root, and copy the CKeditor's plugin Colorbutton file to there:
Drupal site root/libraries/colorbutton
and this plugin prompt should install another plugin Floating Panel (link), so another ckeditor plugin
Drupal site root/libraries/floatpanel
the Drupal depend module Panel Button is also need a same CKeditor plugin:
Drupal site root/libraries/panelbutton
It doesn't finish, the error still there, because we don't know how to config the 5 plugins each other, from the Javascript error message, find the file(also from a article) , find the file:
\core\assets\vendor\ckeditor\ckeditor.js, find the item extraplugins:"", modify it like this:
extraPlugins:"colorbutton",extraPlugins:"floatpanel",extraPlugins : "panelbutton",
It works!
conclusion:
to install a Drupal module, you should:
- install two Drupal Modules following:
ColorButton, Panel Button in this path
Drupal root/modules/ - install three CKeditor plugins following:
ColorButton, PanelButton, FloatingPanel in this path
Drupal root/libraries/ - config enable two Drupal modules, Config Ckeditor interface to use the two buttons
Drupal admin/manage/extend
Drupal admin/manage/Configuration/ckeditor ...(according you plan, like Full HTML) - config ckeditor plugins here:
\core\assets\vendor\ckeditor\ckeditor.js
others? maybe something is not needed, who know that?
The logical maybe like this:
The logical is like this
Drupal 8 --> extend(module) --> Ckeditor --> plugin --> colorbutton
|
D8-extend->Colorbutton<--PanelButton (D8 module)
| |
ColorButton Plugin PanelButton Plugin (CKeditor Plugin)
|
FloatingPanel Plugin
The logical maybe like this:
The logical is like this
Drupal 8 --> extend(module) --> Ckeditor --> plugin --> colorbutton
|
D8-extend->Colorbutton<--PanelButton (D8 module)
| |
ColorButton Plugin PanelButton Plugin (CKeditor Plugin)
|
FloatingPanel Plugin
2016年12月2日星期五
DCDIAG.EXE /E or /A or /C expected: DC could not be queried error 0x6ba
When two DC replication failed, dcdiag will find the error.
Show like this:
1 the service don't running
2 the firewall block the service
2 enable the firewall in Boundin for these three item:
Show like this:
The event log File Replication Service on server
dcdiag-2008.margiestravel.com could not be queried, error 0x6ba
"The RPC server is unavailable."
Reason:
RPC server doesn't work well.1 the service don't running
2 the firewall block the service
Solution:
1 start the service2 enable the firewall in Boundin for these three item:
- Remote Event Log Management (NP-In)
- Remote Event Log Management (RPC)
- Remote Event Log Management (RPC-EPMAP)
2016年10月22日星期六
Config Dlink router for second LAN
I can't use my D-link DIR-845L to support my second LAN, the second LAN as a test behind the default LAN, there is a router between the two LANs.
Dlink configuration /advance /route
can't let you define static route in a LAN interface, so router can't response the second LAN ping, also the first lan work well, the second LAN can't reach Internet.
this article give a amazing solution, change the html form source and make it happened:
https://hyllander.org/content/d-link-dir-655-how-create-static-route-lan
my Router is Dlink DIR-845L, the change option is like this:
the default code:
*****************************
<select id="inf_1" style="width: 150px;" default="1" modified="false">
<option value="WAN-1">WAN (x.x.x.x)</option>
</select>
*****************************
change to
*****************************
<select id="inf_1" style="width: 150px;" default="1" modified="false">
<option value="WAN-1">WAN (x.x.x.x)</option>
<option value="LAN-1">LAN (192.168.9.1)</option>
</select>
*****************************
and it worked also.
Dlink configuration /advance /route
can't let you define static route in a LAN interface, so router can't response the second LAN ping, also the first lan work well, the second LAN can't reach Internet.
this article give a amazing solution, change the html form source and make it happened:
https://hyllander.org/content/d-link-dir-655-how-create-static-route-lan
my Router is Dlink DIR-845L, the change option is like this:
the default code:
*****************************
<select id="inf_1" style="width: 150px;" default="1" modified="false">
<option value="WAN-1">WAN (x.x.x.x)</option>
</select>
*****************************
change to
*****************************
<select id="inf_1" style="width: 150px;" default="1" modified="false">
<option value="WAN-1">WAN (x.x.x.x)</option>
<option value="LAN-1">LAN (192.168.9.1)</option>
</select>
*****************************
and it worked also.
2016年9月27日星期二
Drupal 7 show google DOC
Drupal 7 show google DOC
Try some google documents modules to show Google documents in Drupal, but they don't work.
This is a simple way to show types google documents in Drupal 7 web site, we don't need two much modules or code to finish it, I write this because I forgot why I can do it before, take sometime I find the solution:
this is running in Drupal 7.50 core version
Try some google documents modules to show Google documents in Drupal, but they don't work.
This is a simple way to show types google documents in Drupal 7 web site, we don't need two much modules or code to finish it, I write this because I forgot why I can do it before, take sometime I find the solution:
this is running in Drupal 7.50 core version
- install a module: (https://www.drupal.org/project/custom_formatters) custom_formatters
the current version:custom_formatters-7.x-2.4.zip(this is for windows Drupal7) - install another module:Token (token),this is not require by custom_formatters module installation, but the configuration in custom_formatters depend on this module.
(https://www.drupal.org/project/token)
https://ftp.drupal.org/files/projects/token-7.x-1.6.zip - in the custom_fomatters module list, configuration(also you can find this configuration in structure/formatters)

- add a new formatter settings, use this code:
<iframe width="[node:field_doc_width]" height="[node:field_doc_hight]" src="https://docs.google.com/file/d/[node:field_google_document_id]/preview"></iframe>
you can use title: google-doc, format:HTML+Tokens - update or add a new content type, include 3 fields with the name in the No.4 code
field_doc_width /int
field_doc_high /int
field_google_document_id /text - in the content type edit menu, display manage, the field_google_document_id format change to the custom format just create: google-doc
- add a new content in this content type, put the google article id (example:0B5F_qaK8bYV3bGNFd1pOYXJmbVU)in field_google_document_id, input width and hight and it works.

windows 10 can't boot, partition type, sata mode, repair tools version
I don't really understand the new GPT, WINDOWS 10, 8, UEFI, they come new with new hardware, but they made some problem for my PCs, I found google search can't give good solution to usually users, I try write this article to help anyone(myself) to deal with your situation, I can't give your a one by one step solution, but give you some idea to help you think about you situation.
two of my computer can't boot recently, I viewed this article give me some understanding,
An operating system wasn’t found” error when booting Windows
https://support.microsoft.com/en-us/kb/3103656
but this article make a simple mistake in this command:
bcdboot c:\Windows /l en-us /s m: /f UEFI
before this command, another command is
assign letter=r: (in diskpart command status)
so the m: should be r:
bcdboot c:\Windows /l en-us /s r: /f UEFI
otherwise you can't successfully to follow this article.
My PC's problem is not same with this article, but it give me some ideas.
so if someone you can't boot you PC after you install Win8 or Win 10, try to check your situation in following items:
1 what your BIOS is, the key part is SATA boot MODE: UEFI OR UEFI+LEGACY
another SATA MODE IDE /AHCI
2 what you hard driver is, the newer SATA OR Legacy 80G SATA
3 How many HDs you mixed in you PCs, in my situation, I test use few disks, so I should really care for what disk be used to boot, what type SATA MODE should be setup
4 what OS you just install, Win 7, Win 8, Win 10? I use a Win PE 5.1 to repair the boot following that article mentioned before, the BCD file size is different, so I believe PE 5.1 is come from Win 8, but my OS in PC is Win 10, so my situation is not same with this article. actually, here is two thing you should think about, what type your OS is, what type is you repair WinPE is, maybe you use not Win PE, but care for this, it make different boot file, Win 8 Boot maybe not works in Win 10 PC
5 what disk partition type is, GPT or MBR
I don't make more explaining, I show my situation to help you deal with your situation:
I use a old 80G SATA to install a new Win 10 in my more power PC, the first mistake I didn't unplug another disk with windows 2003, this lead my all documents file in win2003 disappeared, why Microsoft is always make mistake to users?
I should remember:
Backup is the first thing when you try some new thing that come from Microsoft, the new thing just can come from God.
The new Win 10 can't boot when few days when I adjust the boot order, right now I know the problem is I should setup the SATA MODE in UEFI, because my old SATA 80 G in GPT partition model, I think this should be new tech following another new tech, the solution just setup the SATA MODE to UEFI is enough, but I believed the old SATA has some boot file problem, so I following the article to rebuild the BCD file, that make another mistake.
Finally I found the problem is not BCD file, I just delete the new BCD, rename the BCD.BAK to BCD, after the SATA MODE is UEFI, it boot again.
Again, when you have problem in boot you PC after you new installation OS, check the following item:
BIOS SATA MODE: UEFI IDE AHCI LEGACY
HARD DRIVE PARTITION MODE: GPT MBR
OS TYPE: WIN 7, WIN 8, WIN10
REPAIR BOOT CD type: win PE5.1 win pe 10...
usually like this:
if you boot to old OS like windows xp, you sata should be IDE or legacy
if you boot to new win 10, you hd should be in GPT and you SATA should be in AHCI or UEFI
don't busy to repair your system, try to modify bios first
two of my computer can't boot recently, I viewed this article give me some understanding,
An operating system wasn’t found” error when booting Windows
https://support.microsoft.com/en-us/kb/3103656
but this article make a simple mistake in this command:
bcdboot c:\Windows /l en-us /s m: /f UEFI
before this command, another command is
assign letter=r: (in diskpart command status)
so the m: should be r:
bcdboot c:\Windows /l en-us /s r: /f UEFI
otherwise you can't successfully to follow this article.
My PC's problem is not same with this article, but it give me some ideas.
so if someone you can't boot you PC after you install Win8 or Win 10, try to check your situation in following items:
1 what your BIOS is, the key part is SATA boot MODE: UEFI OR UEFI+LEGACY
another SATA MODE IDE /AHCI
2 what you hard driver is, the newer SATA OR Legacy 80G SATA
3 How many HDs you mixed in you PCs, in my situation, I test use few disks, so I should really care for what disk be used to boot, what type SATA MODE should be setup
4 what OS you just install, Win 7, Win 8, Win 10? I use a Win PE 5.1 to repair the boot following that article mentioned before, the BCD file size is different, so I believe PE 5.1 is come from Win 8, but my OS in PC is Win 10, so my situation is not same with this article. actually, here is two thing you should think about, what type your OS is, what type is you repair WinPE is, maybe you use not Win PE, but care for this, it make different boot file, Win 8 Boot maybe not works in Win 10 PC
5 what disk partition type is, GPT or MBR
I don't make more explaining, I show my situation to help you deal with your situation:
I use a old 80G SATA to install a new Win 10 in my more power PC, the first mistake I didn't unplug another disk with windows 2003, this lead my all documents file in win2003 disappeared, why Microsoft is always make mistake to users?
I should remember:
Backup is the first thing when you try some new thing that come from Microsoft, the new thing just can come from God.
The new Win 10 can't boot when few days when I adjust the boot order, right now I know the problem is I should setup the SATA MODE in UEFI, because my old SATA 80 G in GPT partition model, I think this should be new tech following another new tech, the solution just setup the SATA MODE to UEFI is enough, but I believed the old SATA has some boot file problem, so I following the article to rebuild the BCD file, that make another mistake.
Finally I found the problem is not BCD file, I just delete the new BCD, rename the BCD.BAK to BCD, after the SATA MODE is UEFI, it boot again.
Again, when you have problem in boot you PC after you new installation OS, check the following item:
BIOS SATA MODE: UEFI IDE AHCI LEGACY
HARD DRIVE PARTITION MODE: GPT MBR
OS TYPE: WIN 7, WIN 8, WIN10
REPAIR BOOT CD type: win PE5.1 win pe 10...
usually like this:
if you boot to old OS like windows xp, you sata should be IDE or legacy
if you boot to new win 10, you hd should be in GPT and you SATA should be in AHCI or UEFI
don't busy to repair your system, try to modify bios first
2015年1月1日星期四
VMware ESXi5.1 VM console no respond in windows 2012 server core
if this happened.
in VSphere Client, Menu -> Inventory -> Virtual Machine -> Guest : install Vmware tools
It will run in background, few minutes, the console will be shown
in VSphere Client, Menu -> Inventory -> Virtual Machine -> Guest : install Vmware tools
It will run in background, few minutes, the console will be shown
2014年12月21日星期日
Windows 2012R2 Network lost function (with Hyper-v) in Vmware ESXi5.1 change Host hardware
Issue: network adapter can't ping in Win2012 VM when ESXi5.1 change Hardware
Description:
Win2012 can't be Ping when ESXi5.1 host hardware changed
Environment:
1 Host: ESXi 5.1.0 build in 1483097
2 VM: windows 2012R2 evaluation version with Hyper-v feature
3 Host hardware changed because hardware issue, motherboard and CPU changed, include network adapter in Motherboard (non professional server)
program:
network adapter changed or ESXi version updated, the VM Win2012R2 can't be visited in RDP.
Solution:
1 visit vm win2012R2 in VSphere Client 5.1, Remote Desktop can't be visited because network lost function.
2 remove Win2012R2 Hyper-V feature, restart, network resume.
Note:
Hyper-V in a VM just test operation and configuration, can't be run to support a real VM.
Other test Win2012R2 VM without Hyper-v are well.
Win2012 can't be Ping when ESXi5.1 host hardware changed
Environment:
1 Host: ESXi 5.1.0 build in 1483097
2 VM: windows 2012R2 evaluation version with Hyper-v feature
3 Host hardware changed because hardware issue, motherboard and CPU changed, include network adapter in Motherboard (non professional server)
program:
network adapter changed or ESXi version updated, the VM Win2012R2 can't be visited in RDP.
Solution:
1 visit vm win2012R2 in VSphere Client 5.1, Remote Desktop can't be visited because network lost function.
2 remove Win2012R2 Hyper-V feature, restart, network resume.
Note:
Hyper-V in a VM just test operation and configuration, can't be run to support a real VM.
Other test Win2012R2 VM without Hyper-v are well.
2014年7月27日星期日
BibleTime: a timeline of Bible in WordPress plugin
BibleTime is a Wordpress plugin can be used in WordPress platform.
The soft ware give a HTML5 canvas chart to show a timeline of Bible history.
The first version 0.1 include:
(Has update to version 0.2, 2014-08-02)
the follow is the sample figure

The soft ware give a HTML5 canvas chart to show a timeline of Bible history.
The first version 0.1 include:
(Has update to version 0.2, 2014-08-02)
- two genealogy from Luke and Matthew
- Timeline for times name
- some key time point
the follow is the sample figure
in the future version it will update following:
- multi-language support, first support Chinese, French
- the creation time of Bible books in history timeline
- More key time point
- serial prophet chart
- serial prophecy chart against part of result
- Kings history chart
- other country timeline
- popup window for list
- popup window for maps
- ......
Technical:
this plugin is also as a development example, use following program and technical:
- Mysql
- PHP
- JSON
- JavaScript
- HTML5 Canvas
Download address:
Installing method:
- copy unzip folder to wproot/wp-content/plugins(the fold name itself is BibleTime)
- upload BibleTime.zip in WordPress Plugins area (if upload is not work, copy unzip BibleTime folder to plugins)
Configuration:
Use IT:
If you have any idea about this plugin, please leave your message, Thanks~
- The default width is 770, if you want the chart over the WordPress menu, please give a value more than 1000(otherwise the chart will lost position), the max is 1024
- language is 1 only
- Canvas Layer, keep empty for default, if want big size and cover WordPress Menu, give following:
position:absolute;z-index=100;
Use IT:
- after install and active plugin
- input [Bible_Time] in post
- attention:this plugin require a client browser support HTML5, like Google Chrome
If you have any idea about this plugin, please leave your message, Thanks~
Philip Gao
2014-07-27
******************
The day of Lord is near...
2013年9月12日星期四
Microsoft Certified Solutions Developer (MCSD: SharePoint Application)
Microsoft Certified Solutions Developer (MCSD: SharePoint Application)
| Step | Title | Optional training | Required exam | |
|---|---|---|---|---|
| 1 | Programming in HTML5 with JavaScript and CSS3 | |||
| 2 | Developing ASP.NET MVC 4 Web Applications | |||
| 3 | Developing Microsoft SharePoint Server 2013 Core Solutions | |||
| 4 | Developing Microsoft SharePoint Server 2013 Advanced Solutions | Not yet available |
70-480: At Course Completion
After completing this course, students will be able to:
- Explain how to use Visual Studio 2012 to create and run a Web application.
- Describe the new features of HTML5, and create and style HTML5 pages.
- Add interactivity to an HTML5 page by using JavaScript.
- Create HTML5 forms by using different input types, and validate user input by using HTML5 attributes and JavaScript code.
- Send and receive data to and from a remote data source by using XMLHTTPRequest objects and jQuery AJAX operations.
- Style HTML5 pages by using CSS3.
- Create well-structured and easily-maintainable JavaScript code.
- Use common HTML5 APIs in interactive Web applications.
- Create Web applications that support offline operations.
- Create HTML5 Web pages that can adapt to different devices and form factors.
- Add advanced graphics to an HTML5 page by using Canvas elements, and by using and Scalable Vector Graphics.
- Enhance the user experience by adding animations to an HTML5 page.
- Use Web Sockets to send and receive data between a Web application and a server.
- Improve the responsiveness of a Web application that performs long-running operations by using Web Worker processes.
70-486: At Course Completion
After completing this course, students will be able to:
- Describe the Microsoft Web Technologies stack and select an appropriate technology to use to develop any given application.
- Design the architecture and implementation of a web application that will meet a set of functional requirements, user interface requirements, and address business models.
- Create MVC Models and write code that implements business logic within Model methods, properties, and events.
- Add Controllers to an MVC Application to manage user interaction, update models, and select and return Views.
- Create Views in an MVC application that display and edit data and interact with Models and Controllers.
- Run unit tests and debugging tools against a web application in Visual Studio 2012 and configure an application for troubleshooting.
- Develop a web application that uses the ASP.NET routing engine to present friendly URLs and a logical navigation hierarchy to users.
- Implement a consistent look and feel, including corporate branding, across an entire MVC web application.
- Use partial page updates and caching to reduce the network bandwidth used by an application and accelerate responses to user requests.
- Write JavaScript code that runs on the client-side and utilizes the jQuery script library to optimize the responsiveness of an MVC web application.
- Implement a complete membership system in an MVC 4 web application.
- Build an MVC application that resists malicious attacks and persists information about users and preferences.
- Describe how to write a Windows Azure web service and call it from and MVC application.
- Describe what a Web API is and why developers might add a Web API to an application.
- Modify the way browser requests are handled by an MVC application.
- Describe how to package and deploy an ASP.NET MVC 4 web application from a development computer to a web server for staging or production.70-488: At Course Completion
After completing this course, students will be able to:- Design and manage features and solutions.
- Develop code for custom server-side components.
- Manage and customize authentication and authorization.
- Create custom sites and lists and manage the site lifecycle.
- Explain the capabilities and design choices for SharePoint apps.
- Use the client-side object model and the REST API.
- Develop provider-hosted and auto-hosted SharePoint apps.
- Distribute and deploy SharePoint apps.
- Create custom workflows to automate business processes.
- Use fields and content types to manage taxonomy.
- Customize the appearance and behavior of user interface elements.
- Customize navigation and site branding.
| Step | Title | Optional training | Required exam | |
|---|---|---|---|---|
| 1 | Installing and Configuring Windows Server 2012 | |||
| 2 | Administering Windows Server 2012 | |||
| 3 | Configuring Advanced Windows Server 2012 Services
After
successfully completing steps 1-3, you'll earn a Microsoft Certified
Solutions Associate (MCSA): Windows Server 2012 certification.
| |||
| 4 | Core Solutions of Microsoft SharePoint Server 2013 | |||
| 5 | Advanced Solutions of Microsoft SharePoint Server 2013 | |||
| 6 | Developing Microsoft SharePoint Server 2013 Core Solutions | Not yet available | ||
| 7 | Developing Microsoft SharePoint Server 2013 Advanced Solutions | Not yet available | ||
| 8 | MCSM SharePoint Knowledge Exam | |||
| 9 | MCSM SharePoint Lab Exam |
Microsoft Certified Solutions Expert (MCSE:SharePoint)
Microsoft Certified Solutions Expert (MCSE:SharePoint)
Microsoft make some changing recently, exam 346,347 for Office 365 can substitute exam 410,411,412
| Step | Title | Optional training | Required exam |
|---|---|---|---|
| 1 | Installing and Configuring Windows Server 2012 | ||
| 2 | Administering Windows Server 2012 | ||
| 3 | Configuring Advanced Windows Server 2012 Services
After
successfully completing steps 1-3, you'll earn a Microsoft Certified
Solutions Associate (MCSA): Windows Server 2012 certification.
| ||
| 4 | Core Solutions of Microsoft SharePoint Server 2013 | ||
| 5 | Advanced Solutions of Microsoft SharePoint Server 2013 |
| https://www.microsoft.com/learning/en-us/mcse-sharepoint-certification.aspx | ||||||||
| (do it in Windows`s interface and Powershell command line if possible) | ||||||||
| 70-410:At Course Completion
After completing this course, students will be able to:
| ||||||||
CDN$ 26.30 http://www.amazon.ca/Exam-Ref-70-410-Configuring-ebook/dp/B00ANCH0ZS/ref=tmm_kin_title_0?ie=UTF8&qid=1379003205&sr=1-1 | ||||||||
http://www.microsoft.com/learning/en-us/course.aspx?ID=20410B |
After completing this course, students will be able to:
- Deploy and Maintain Server Images
- Configure and Troubleshoot DNS
- Maintain Active Directory Domain Services (AD DS).
- Manage User and Service Accounts
- Implement a Group Policy Infrastructure
- Manage User Desktops with Group Policy
- Configure and Troubleshoot Remote Access
- Install, Configure and Troubleshoot Network Policy Server (NPS) role
- Implement Network Access Protection (NAP)
- Optimize File Services
- Configure Encryption and Advanced Auditing
- Implement Update Management
- Monitor Windows Server 2012
CDN$ 39.46 http://www.amazon.ca/Training-Guide-Administering-Windows-Server/dp/0735674132/ref=sr_1_2?s=books&ie=UTF8&qid=1379003426&sr=1-2&keywords=70-411
70-412:At Course Completion
After completing this course, students will be able to:
- Implement advanced network services.
- Implement advanced file services.
- Implement Dynamic Access Control.
- Implement distributed Active Directory Domain Services (AD DS) deployments.
- Implement AD DS sites and replication.
- Implement Active Directory Certification Services (AD CS).
- Implement Active Directory Rights Management Services (AD RMS).
- Implement Active Directory Federation Services (AD FS).
- Implement network load balancing (NLB).
- Implement failover clustering.
- Implement failover clustering with Hyper-V.
- Implement disaster recovery.
CDN$ 26.30 http://www.amazon.ca/Exam-Ref-70-412-Configuring-Advanced/dp/0735673616/ref=sr_1_1?s=books&ie=UTF8&qid=1379003507&sr=1-1&keywords=70-412
70-331:At Course Completion
After completing this course, students will be able to:
- Describe the key features of SharePoint 2013
- Design an information architecture
- Design logical and physical architectures
- Install and configure SharePoint Server 2013
- Create web applications and site collections
- Plan and configure service applications
- Manage users and permissions
- Configure authentication for SharePoint 2013
- Secure a SharePoint 2013 deployment
- Manage taxonomy
- Configure user profiles
- Configure enterprise search
- Monitor and maintain a SharePoint 2013 environment
http://www.microsoft.com/learning/en-us/course.aspx?ID=20331B
CDN$ 26.30
http://www.amazon.ca/Exam-Ref-70-331-Solutions-SharePoint/dp/0735678081
70-332: At Course Completion
After completing this course, students will be able to:
- Describe the core features of SharePoint 2013
- Plan and design a SharePoint 2013 environment to meet requirements for high availability and disaster recovery
- Plan and implement a service application architecture for a SharePoint 2013 deployment
- Configure and manage Business Connectivity Services features in a SharePoint 2013 deployment
- Plan and configure social computing features
- Plan and configure productivity and collaboration platforms and features
- Plan and configure Business Intelligence solutions
- Optimize the search experience for an enterprise environment
- Plan and configure enterprise content management in a SharePoint 2013 deployment
- Plan and configure a web content management infrastructure to meet business requirements
- Manage solutions in a SharePoint 2013 deployment
- Configure and manage apps in a SharePoint Server 2013 environment
- Develop and implement a governance plan for SharePoint Server 2013
- Perform an upgrade or migration to SharePoint Server 2013
The basic books: $158.46
Total exam fee: $750
Training time: 5 weeks
2013年7月22日星期一
How to install SharePoint Contoso Education Demo Project
Abstract:
Microsoft offer a SharePoint 2010 demo project against SharePoint application in education, it can be download on codeplex.com, but the installation will be encounter some problem, the install guide is too simple to installing the software pack, this blog will give a sample to introduce some key step to help you deployment the sample project easily.it include:
- what is your want and what is you should prepare
- what is the demo project include
- how to config the test environment
- my test environment, installing log, project browser note
1 what is your want and what is you should prepare
a) The demo project will give you 6 typical site collections to help you understand what SharePoint 2010 can perform in education field, it will give you a simple sample to understand the structure design, some advance function will help you to learn the configuration methods.b) To deploy this project, you should have the follow knowledge:
- basic SharePoint administration
- basic windows AD and windows 2008 servers
- basic SQL server (2008R2) administration, include SSRS
- Powershell Script
c) what environment you should prepare
- Windows 2008 server
- SQL Server 2008R2
- SharePoint Server 2010 Enterprise
- AD domain server (VM or Physical Server)
- SharePoint Server and SQL Server(VM or Physical Server), 4G/2Cores
2 what is the demo project include:
the project include 6 site collections which list followingintranet.contoso.edu
intranet.contosou.edu
www.contoso.edu
extranet.contoso.edu
www.contosou.edu
extranet.contosou.edu
contosou.edu is contosou university education sample, contoso.edu is School District sample.
www is public site, another two type sites are intranet & extranet.
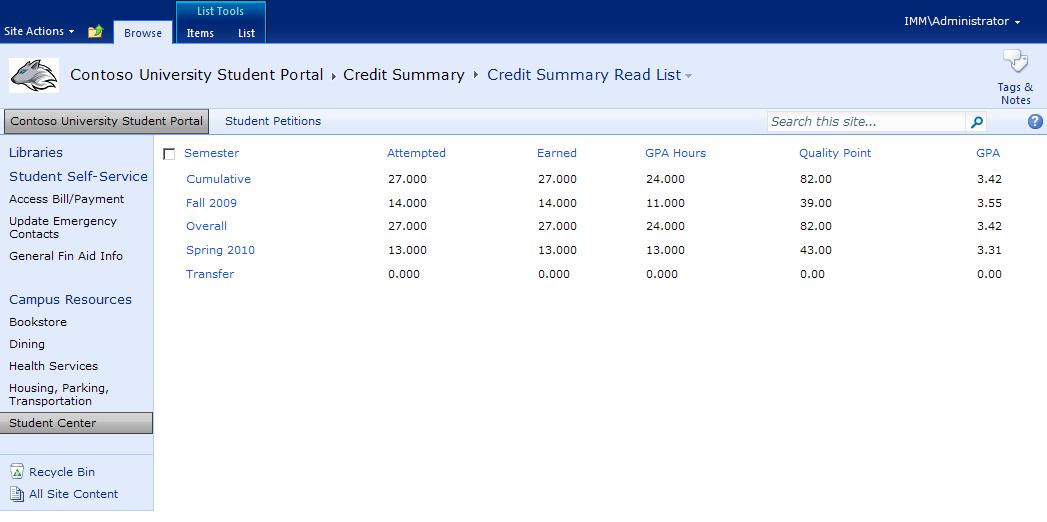
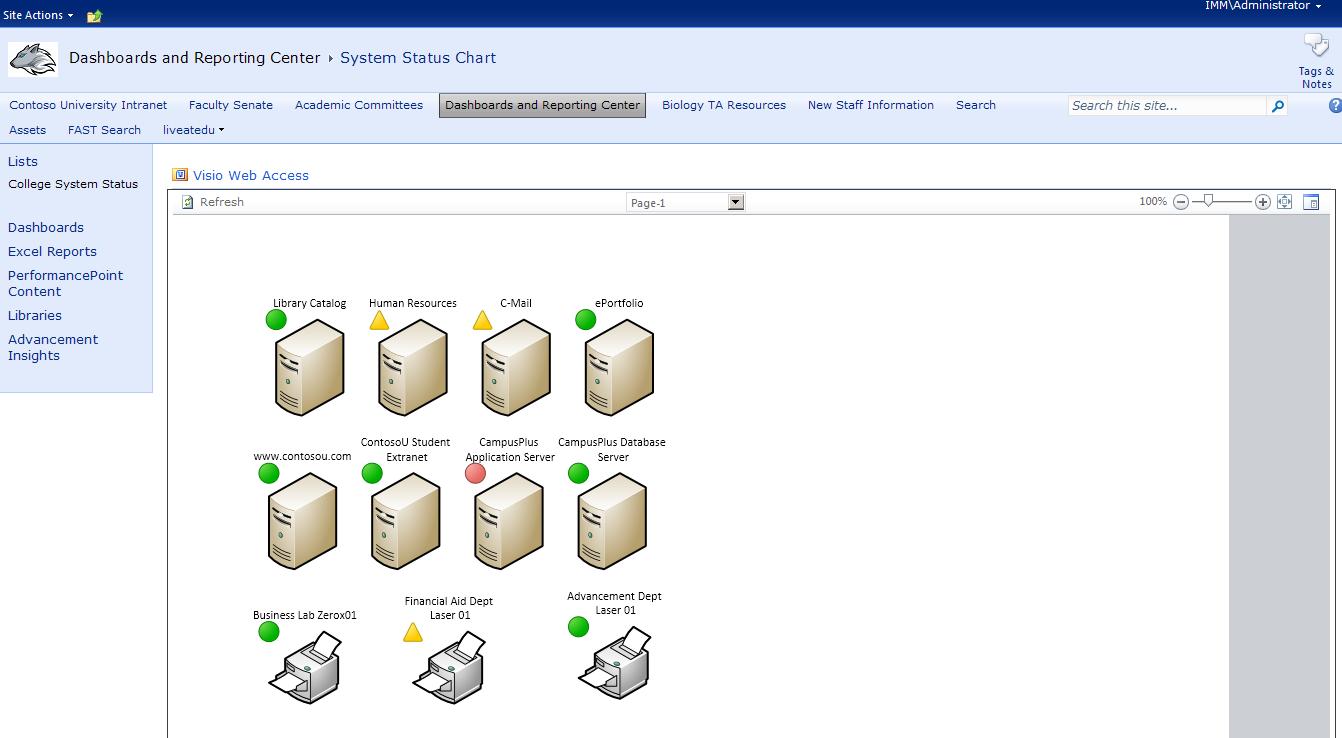
some typical pages like following:





3 how to config the test environment
the download URL is confusion, I have 3 web-pages to download the project pack:http://sp2010education.codeplex.com/releases/view/50151
the title is SharePoint 2010 Education Demo Project / Release 1
2010-08-06
http://sp2010education.codeplex.com/releases/view/63876
the title is SharePoint 2010 Education Demo Project / Release II SharePoint 2010 Education Scenarios
2011-4-5
http://sp2010education.codeplex.com/releases
the title is SharePoint 2010 Education Demo Project / Release SharePoint SP1 for Education Solutions
2011-11-21
some of them you can't get a full of the installation pack, I guess the upload wrong, the "Installation Instructions" document is almost the same in three version, and it too simple to let you deploy the all pack easily. So, I have to try to test every pack to keep all the site collections was installed, but after the deployment, I can't remember what version is against to which installation pack.
let us to show what the installation pack include:
- Content_Pack_Installation_Instructions.docx (installation guide, very simple)
- ContentPackInstaller.exe (installation exe file)
- Contoso K12 BI Content Pack 2.0.0.zip (contoso.edu database pre-installation pack)
- Contoso_University_BI_Content_Pack_2.0.0.zip (contosou.edu database pre-installation pack)
- SharePoint 2010 Contoso K-12 Extranet Demo 1.0.0.zip (extranet.contoso.edu)
- SharePoint 2010 Contoso K-12 Intranet Demo 1.0.0.zip (intreanet.contoso.edu)
- SharePoint 2010 Contoso K-12 Public Internet Demo 1.0.0.zip (www.contoso.edu)
- SharePoint 2010 Contoso University Public Internet Demo 1.0.0.zip (www.contosou.edu, university)
- ContosoUniversityIntranet2.0.zip (intranet.contosou.edu, university)
- SharePoint 2010 Contoso University Intranet Demo 2.0.0.zip (extranet.contosou.edu, university)
the installation guide give some details to help you to execute the all deployment, but if some error happened, it difficult to find a solution to correct it, after all the deployment, these key feature should be noticed (notice these are important):
- all the install server platform must in Windows 2008(maybe R2), also just SharePoint need a Windows 2008 platform, but the installation scripts is run in Powershell, so if you run a Domain server and a SQL server in Windows 2003, it will be failed.
- SharePoint and SQL Server in same server maybe more easy, I test different situation, this mode deployment worked.
- the test Domain should use the netbios name : Contoso, all the installation packs will install some domain users based the Domain name: Contoso
- install SQL Server standalone, don't install SharePoint integrate SQL server, because the Demo project need run some Dashboard connecting to SQL Server SSRS, so the SQL Server must install with Reporting Server, should add some service account to both SQL Server and SSRS.
- install SharePoint server the first release version, don't install the SP1 patch, if directly install the SharePoint Server SP1, some of the demo pack can't be installed.
- if one time install some pack failed, you could try to install it for more than 2 times, the site collection will be installed in these ways:
Create web application: must success, can be execute by manual
Restore Site: must success, can be install in other servers and migration to object server.
set permissions:
import the BDC model
(if times install get error message, should read the installation log, to make sure the key step success, sometimes you should understand the install.ps1, the Powershell script) - the permissions can be setup by yourself, after every site collection installation, browser all the site collection, especially the BDC list, some function need more configuration in System Center. for more details you can read this log attachment files: install record (Contososample.docx) and test record (ContosoEducation.docx).
4 my test environment, installing log, project browser note
- Domain server: windows 2003/windows 2008R2 two domain servers, name IMM
- SQL server 2008R2 with SSRS
- SharePoint Server 2010 Enterprise install with SQL server in same server, SharePoint have been update to 14.0.6028.5000/6029.1000/6131.5000/6136.5000/6137.5000
because the install environment is different with the standard need, a lot of job is run PowerShell for me.
more details can download the two record files:
install record (Contososample.docx)
test record (ContosoEducation.docx)
google driver shared:
https://docs.google.com/file/d/0B5F_qaK8bYV3NVVDQ1l0Z0JENWs/edit?usp=sharing
https://docs.google.com/file/d/0B5F_qaK8bYV3TUlHZUtzU1NfSWc/edit?usp=sharing
hope this will help you.
Philip Gao
Philip Gao
订阅:
博文 (Atom)